Pair Rescued from Cliff
Oct. 27, 2008
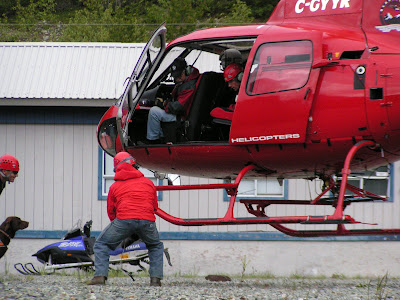
19 WING COMOX – A 442 Transport and Rescue Squadron CH-149 Cormorant helicopter rescued two Victoria climbers from Mt. Arrowsmith early this morning. The pair used their cell phone to call for help which led to the Cormorant being tasked to the mission by the Joint Rescue Coordination Centre in Victoria.
“It appeared like the two climbers got lost on their descent,” said Sgt. Wade Simpson, the search and rescue (SAR) team leader from the mission. “They were well prepared for the hike, but reached a point where they didn’t want to continue in the darkness. They tied themselves in on the rock wall and called for assistance.”
Port Alberni Ground SAR was on scene when the Cormorant arrived, initiating a rescue from the base of the mountain. The pair was located 1750 meters up the mountain on the side of a cliff, making ground rescue challenging in the dark. The Cormorant easily found the two climbers, but it was the crew’s continuous training at climbing cliffs such as the Devil’s Ladder at the Comox Lake that prepared them for the challenging hoist.
“Practicing at the Devil’s Ladder came into play big time on this one,” said Sgt. Simpson. “The pair was located on a small ledge of a sheer cliff wall, and the techniques required for the crew to perform hoists in this situation were well practiced aiding in the crew’s comfort level. We were really happy to be able to do that mission so that the Ground SAR didn’t have to climb in the night. Mountain rescue climbs at night are that much more difficult, all you have is your headlamp on, it’s harder to find holds and you can’t find route selection.”
After the climbers were extracted from the cliff wall, they were flown to a pad near Port Alberni where they were transferred to Port Alberni Ground SAR. The pair’s current condition is unknown.
Cormorant Crew: Capt. Mulholland, Aircraft Commander; Maj. von Kruse, First Officer; Cpl. Legendre, Flight Engineer; Sgt. Simpson and Sgt. Seguin, SAR Techs.
Monday, October 27, 2008
Wednesday, July 23, 2008
Backcoutry Essentials
Backpacking ten essentials: the first ten items in this list are the selections of essential backpacking gear which The Mountaineers refer to as The Ten Essentials and promote as critical and essential items which belong in your pack as insurance against the unexpected. Although you may not use all the backpacking ten essentials every day, they can be life savers in an emergency.
Also, if you shop with prudence, these essential gear items can be lightweight, as well.
Communication: 911 Service is available throughout Whistler.
Contact: Search and rescue through local RCMP, Whistler SAR can be paged through RCMP. We utilize helicopter rescue in most cases, and are equipped with long-line rescue equipment. Making yourself visible from the air in a open location can help, along with co-ordinates of your location.
Ambulance: Air ambulance service is available throught the Valley if your at a site that they can easily land. Availble though EHS. Usually about 1hr away.
Being able to call for help is essential, and can greatly add to your survival. Carry a cell phone, and charge it before you go. Most mountain top locations will have cell service in the immediate area. Cell sites are located at Black Tusk Microwave, Whistler peak, Alpine, Alta lake road. Valley bottoms tend to have poor coverage.
Also make sure you tell a responsible person where your going, and your time of return.
Making a detailed trip plan, and leaving it with a responsible person. One way to do this is preview your anticipated route in google earth, draw a path by clicking on the plot a path icon along your route, even plot campsites etc. by adding new placemarks, and then save as a .kmz file. Under places select your current route and right click on your route (save place as)
Open Google earth and click on examples
Example:
A route along the musical bumps
A planned campsite
A day trip to Russet Lk
A picture is worth a million words, and Whistler SAR can easily upload this file from your designated contact.
Conversely, it is generally inexperience and lack of good judgment that gets people into trouble. Not only must we have the proper equipment -- including the ten essentials plus four -- and know how to use them, but we must also cultivate knowledge and wisdom related to the backcountry activities that we engage in--thru self-study, courses, and leveraging off the experiences of others.
The most important essential , however, is not on the list--"Common Sense". Having the right gear is one thing, knowing how and when to use it is quite another. Most often, it's not a person's equipment that saves their bacon. It's their experience, know-how, and good judgment. Learn to be extra carefull, and not take extra risks toward the end of the day, or in remote locations.
~ ~ ~ ~ ~
1. Map
~ ~ ~ ~ ~
2. Compass
~ ~ ~ ~ ~
3. Flashlight / Headlamp
~ ~ ~ ~ ~
4. Extra Food
~ ~ ~ ~ ~
5. Extra Clothes
~ ~ ~ ~ ~
6. Sunglasses
~ ~ ~ ~ ~
7. First-Aid Kit
~ ~ ~ ~ ~
8. Pocket Knife
~ ~ ~ ~ ~
9. Waterproof Matches
~ ~ ~ ~ ~
10. Firestarter
~ ~ ~ ~ ~
11. Water / Filter / Bottles
~ ~ ~ ~ ~
12. Whistle
~ ~ ~ ~ ~
13. Insect Repellents or Clothing
~ ~ ~ ~ ~
14. Sunburn Preventatives
~ ~ ~ ~ ~
1. Map | GPS | Altimeter
Always carry a detailed map of the area you will be visiting. If alpine scrambling 1:50,000 or otherwise navigating cross-country consider the 1:100,000--they reveal considerable detail. Local Maps 92J/2 Whistler, 92J/3 Brandywine falls, 92G/15 Cheakamus river cover the entire Whistler area. Available at escape route. For traveling on lower trails, many local maps are available in 1:25,000 scale with trails overlaid on them is a good choice, mountian bike maps are excellant with countours, and show almost evry trail in the valley. The point is to carry a map appropriate for the area you will be in and the activity you will be undertaking--and know how to use it ! GPS now have built in base maps. OK if you have lots of extra batteries for a day trip. The newer ones work in most places, and tend to work well in the forest if turned on and aqquired a position in a open area first. Altimeters are usefull for finding your elevation on a map, and to calculate how much vertical you've done.
2. Compass:
Carry a compass, at all times, in the backcountry--and know how to use it ! Some features to look for: 0 to 360 degrees, preferably, in 2 degree increments;
liquid filled, which protects the magnetic needle and its jeweled bearing and minimizes fluctuation; a base plate--3" to 4", in length-- which can be used as a straight-edge for taking map bearings and determining distances on maps; an adjustable declination to account for the difference between Magnetic North and True North. The compass responds to Magnetic North, whereas, maps are based upon True North. Therefore, the compass needs to be adjusted to compensate. An adjustable declination feature lets you turn a small screw to "permanently" adjust declination to match the geographic area you will be in, so that you don't need to calculate your bearing each time. Declination in Whistler is around 19.5 degrees east of Grid north, a fold-out mirror for sightings. The mirror allows for more accurate readings because you can position the mirror such that the mirror and the distant objective are both visible at the same time. A clinometer is useful for measuring vertical angles and, thus, measures slope steepness. This feature is helpful in determining avalanche potentials, and for determining position on a map.
The following compasses are lightweight and would be the minimum you would want to carry. They probably would suffice as an emergency gear item while backpacking entirely on trails.
Suunto A10; weighs 1 oz, 0 to 360 degrees in 2 degree increments; liquid-filled with straight-edge.
Silva Polaris; (same weight and features as Suunto A10).
For serious backcountry travel where map and compass will be used for navigation, the following compasses are recommended:
Suunto MC-2G Navigator; weighs 2.6 oz, has all the features itemized above, plus luminous bezel and markings.
Silva Ranger; weighs 3 oz, (same features as Suunto MC-2G, only without the luminous bezel).
3. Flashlight / Headlamp:
Flashlights and/or Headlamps are important even on day trips. You never know when you might need to spend the night or make that last mile or so after sunset, or due to a minor problem your running late! Here's some features to look for:
lights which are water resistant--they function reliably in all weather. Look for rubberized bulb housing and battery compartments, or at least adequate rubber gaskets. Lights which come with extra bulbs stored inside their housing.
lights which have rotating head or body as the on/off mechanism. Avoid lights with on/off switches which can accidentally be turned-on as it is jostled about in your pack.
Suggestions for a small, lightweight, high-quality hand held light:
Petzl Zipka; (3 AAA batteries) weighs 2.2 oz, built-in retractable head strap. Strong beam from 3 LED bulbs.
Black Diamond ION; (1 6 volt battery - included) weighs 1.1 oz, uses 2 LED bulbs.
4. Extra Food:
Whenever you go out, even for a day trip, bring extra food in case you are delayed by emergencies, foul weather, or just get lost. The mountaineers suggest a one-day supply. At the very least, bring one good meal more than what you need. The food should require little or no cooking. If your extra food will require cooking, make sure you also carry extra fuel for your stove.
5. Extra Clothing:
In addition to the basic layers you would normally take on an outing, bring extra clothing which would get you through an unplanned bivouac through the worst conditions you might come up against. Extra clothing means a little extra beyond what you would normally carry, just in case of emergencies. Synthetic or wool should be your only choice. Cotton kills.
In addition to the extra clothes, carry an emergency shelter such as a waterproofed tube tent or mylar Space Bag (or blanket). The Space Bag only weighs about 2.5 ounces but will completely encase you and keep you warm and dry. Another option is a VBL (vapor barrier liner ) like the Western Mountaineering "Hot-Sac" VBL. The VBL can be used on a regular basis to add warmth to your sleeping bag as well as serve as an emergency shelter. It's a little heavier than the Space bag -- 6.5 ounces.
6. Sunglasses:
Your eyes can experience damage from the intensity of mountain skies, ultraviolet rays, and light reflecting off of snow. As elevation increases so does the intensity of ultraviolet rays. Adequate eye protection is a must!
For traveling on snow, get a pair of glacier glasses with side shields which reduce reflective light reaching the eyes. Good, quality glacier glasses typically cost in the $50 to $150 range.
There are many other brands of sunglasses and glacier glasses which are less expensive and provide adequate protection. Shop around, but be careful. Try to stay with reputable brand names. Your eyes will know damage, long before you feel discomfort.
7. First-Aid Kit:
Carry first-aid supplies for minor injuries. In particular, carry plenty of adhesive band-aids and sterilized bandages, because they can't be easily improvised in the woods. What to carry ? A good book to reference is "Mountaineering First Aid" 3rd edition, by Lentz, Macdonald, and Carline, published by The Mountaineers.
This booklet was used as a text when I took the Mountaineers' MOFA (Mountaineering Oriented First Aid) course. I use it now to refresh my memory. It is easy reading, small ( 5 1/4 x 8 1/2 inches ), brief ( 95 pages ) and inexpensive ( $8.95 ). It identifies what items to carry, as well as what to do in emergency situations.
Once you are familiar with the supplies you need, you can purchase a kit or make your own. If you purchase one, you'll most likely need to add to it ( items like CPR mask, rubber gloves, etc. ) since most commercially prepared kits are inadequate.
Also, If you spend any time in the backcountry, it would be a good idea to enroll in a mountaineering first aid course.
8. Pocket Knife & Tools:
Your basic backpacking tool kit. A good example of a single piece of gear which has multiple uses. For example, a Wenger "Master" Swiss Army Knife has a locking blade; "slip-joint" pliers/wire crimper/wire cutters; springless self-sharpening scissors; wood saw; nail file/cleaner; corkscrew; awl/reamer; can opener; cap lifter; tweezers; and toothpick--all at a weight of about 6 ounces. Swiss-Army knives are available with more and less features.
At a minimum, knives are useful for first aid, food preparation, cutting moleskin strips, cutting rope and making repairs. However, scrutinize your needs before you go out and buy a honker like the Victorinox Swiss Champ which has many tools you probably don't need and weighs 1/2 pound ! If you don't actually use a feature, then you probably don't need to be carrying it around
9. Waterproof Matches:
Carry matches which have been waterproofed or wind and waterproofed, or else carry extra strike-anywhere matches--along with something to strike them on-- in a waterproof container. Keep these matches separate from your regular match or butane lighter supply. Keep them available for emergency situations.
There are many commercially prepared waterproof/windproof matches available on the market, e.g., "Hurricane" and "Cyclone" brands of wind & waterproof matches and Coghlan's waterproof safety matches.
10. Firestarter:
Fire starters are useful for quickly starting a fire, especially in emergency situations. They are also useful for igniting wet wood. There are several commercial fire starters available: magnesium blocks w/striking flint; chemically-treated fire sticks, etc.
In addition, numerous home-made fire starters work just fine: plumber's candles (wax); compressed balls of dryer lint mixed with or covered with melted paraffin; small strips of waxed cardboard (from old produce boxes); small flammable containers--individual egg-carton cups filled with mixtures of wood shavings, wax, & lint; etc.
11. Water / Filter / Bottles:
Carry plenty of fresh water. If you are familiar with the area in which you are traveling, and can be sure that water sources are available, carry enough water to get you there.
If you aren't bringing your water from home or a public source, treat the water you draw from the backcountry, regardless of the source. These days, everything is suspect.
Use water filter, purifier, chemical tablets, or boiling to treat the water before consuming.
-------------------------
For transporting inside your pack, use lightweight water bottles, such as Nalgene 16 oz and 32 oz lexan polycarbonate or high-density polyethylene wide-mouth bottles. Some folks use other containers such as old plastic pop bottles. That's okay too. Be careful they don't crack and/or leak, though. Hydration resevoirs are good, but can be fragile if not properly protected, and turn your pack into a watery mess.
12. Whistle:
For emergencies: when you're lost, someone else is lost, or you're hurt and need help, etc.
A better choice would be a pealess plastic whistle like the Fox 40. It is ultra-light and very shrill.
13. Insect clothing or repellents:
I don't know about you, but summer really "bugs" me. Three ways to deal with the biting flies, mosquitoes, knats, etc. are to (1) let them eat you (2) use repellents or (3) wear clothing. Since the first option doesn't cut it, there are numerous commercial repellents on the market. Most of them are DEET based. REI Jungle Juice works okay but the stuff gets everything oily. There are many good creams but they need to be reapplied more frequently. There are extended duration DEET products which do not soak into the skin as fast and provide up to 12 hours of protection--such as 3M Ultrathon (now only available as "Hourguard 12" thru Amway).
14. Sunburn preventatives:
Remember, the higher the elevation, the greater the intensity of the sun. Although each of us has a different capacity -- a.k.a. different pigmentation -- for withstanding the sun's onslaught, the message is the same--the penalty for underestimating your need for protection is severe.
In sunny conditions, wear light-colored clothing and cover exposed skin, at least, with SPF rated sunscreen appropriate for you, at least 15. A big brimmed sunhat can save you from heat stroke and sunburn.
Make your own survival kit
The Pocket Kit
Fitting inside an altoids tin, this kit is easy to keep on hand at all times
This is ideal for anyone who wants to have the essential survival gear along each time they head into the field. Everything fits in the Altoids tin (above). It fulfills all the component groups except for shelter and protection, but add a survival blanket to your pocket and you'll be covered.

Fire and Light
From left to right: Steel striker with Mini-Match magnesium fire starter. One side of the starter is magnesium and the other is flint. You scrape shavings off the former and then light them with a spark from the latter. Waterproof-windproof matches with a striker, placed in a mini zip-seal bag, then rolled and taped. 5 Tinder-Quik fire tabs, which light even when wet. They're great for stuffing in all the extra spaces of a survival tin to eliminate rattling. Candle. I cut a 1/2-inch-diameter emergency candle down to the height of the Altoids tin, so it fits in one corner. Photon Micro-Light II, a bright LED flashlight.

Water and Food
From left to right: Water bag. A Reynolds Oven Bag does the trick, cut down to fit in the tin, with a 1-quart marking as a guide for using iodine tablets. 20 Potable Aqua water purification tablets, repackaged in a mini glass vial. 50 feet of braided fishing line wound on a round sewing-machine bobbin. Fishing tackle kit in a plastic tube. Inside are assorted hooks, swivels, and split shot. 10 feet of 24-gauge snare wire.

Signaling and Navigation
From left to right: Custom-made signal mirror. Commercial versions are all too thick to fit in this kit. I used a durable, ultrathin piece of plastic called mica (locksmiths slide this between a door and jamb to push the lock back). I glued on a piece of Mylar film, rounded the corners, and made a sighting hole. 20mm AA liquid-filled button compass. It's the best-quality instrument that will fit in the tin.

Tools and Medical Supplies
From left to right: Commando Wire Saw, a small survival cable saw. 2 X-Acto knife blades, without the handle. You should always have a real knife on your person; these blades are for backup. Small packet of antibiotic ointment. 2 butterfly closures.

Multipurpose
From left to right: Several yards of nylon string. 2 magnetized sewing needles for sewing or making an emergency compass (floated in water on a leaf, the needle will face north). Small piece of glue, cut off a glue-gun stick. Small laminated card with instructions for water purification tablets and fishing knots. Fresnel magnifier. This lens can start a fire by magnifying the sun's rays to a point on your tinder, causing combustion. Safety pin, for repairing clothes and straps. 2 feet of aluminum foil for making a cup, signaling, cooking fish, etc.

Sunday, June 08, 2008
Tuesday, June 03, 2008
Dog Hover Entry / Exit
Local Avalanche Dog's Sadie and Coho brush up on their hover/ entry exit skills Tuesday night. 


Saturday, May 17, 2008
Snowpack goes Isothermal

It would appear we are in the midst of a large natural avalanche cycle. Due to extreme heat and deep weaknesses in the snowpack
 Heavenly basin late Saturday afternoon let go significantly for
 first time in 25 years
 Blackcomb bowl
A mostly isothermal snowpack is being stressed by very warm temperatures. Little if any overnight crust recovery will alternate with very high freezing levels and may begining to stress deep istabilities in the snowpack. All these pictures are natural avalanche's. The December layer has awoken beware!
 Lower Diesie ridge Saturday
A large natural cornice triggered size 2-3 avalanche off lower diesie ridge during the warming on the weekend. Possibly sliding on the Dec 3-4 rain layer. Temperatures yesterday reached +12.5 c at 2300m.
Also other reports of south facing slopes going isothermal and sliding to ground.
 Cornice Impact zone
Flute slide
.JPG)
.JPG)
.JPG)
.JPG)
.JPG)
.JPG)
.JPG)


Brandywine area

From Canadian Avalanche Assoiciation
Warm Weekend Brings Avalanche Danger
Revelstoke,
May 14, 2008. The Canadian Avalanche Centre (CAC) is issuing a “heads
up” warning for anyone planning a mountain backcountry outing in Alberta or BC this coming weekend. The forecast dramatic rise in temperature, combined with the unusual
amount of snow that still remains in the mountains, may result in significant avalanche activity.
“We are well past our normal operating season and still talking about the danger of
avalanches,” says John Kelly, Operations Manager at the CAC. “This poses some big
problems for us at the avalanche centre because we have no current data about conditions,making it impossible to give specific targeted advice. However, we do know the basic ingredients are out there for a significant avalanche cycle.”
There are three key factors that make this situation unusual.
o This year’s snowpack is fundamentally unstable, with many deeply buried weak layers. In some areas the base of the snowpack remains extremely fragile, comprised of sugary snow with very little strength.
o A cold spring has kept the surface layers solid and strong, and preserved the weakness below. This creates prime conditions for slab avalanches, which are the most destructive type.
o The sudden hot weather we are expecting this weekend will melt the surface layers, and will trigger some large avalanches.
The CAC advises anyone travelling in avalanche terrain this weekend to leave a wide
margin of safety. Everyone in the party should be equipped with safety gear and be
familiar with how to use it.
Link to WB Avalanche Bullitin
Sunday, May 04, 2008
Crevasse Rescue
A warning this long weekend snow bridges will become weak as well as potential for sizable cornice fall in the backcountry with temperatures rising toward 30c valley bottom, freezing levels are forecast to be above 4200m.
 Ripsaw Glacier
Whistler Search and Rescue are advising people who are ski-touring glaciers in the backcountry to keep themselves roped together after a crevasse rescue Sunday.
At around 12:30 p.m. a 26-year-old B.C. woman crashed through a snow bridge on the Spearhead Traverse and fell nine metres into a bergschrund crevasse where she became lodged.
The group was luckily within cell-phone range and her two male companions called 911 and a rescue got underway immediately. Nine rescuers went to the area in two helicopters.
Ripsaw Glacier and the usual high route where the snowbridge collapsed
Fortunately the weather was good and the woman was uninjured, all of which helped the rescue have a happy ending.
But said Whistler SAR manager Brad Sills, during the course of the rescue it became clear that, while the party was well equipped and in good physical shape, none of them had a rope.
Indeed two more ski touring groups on the same path who stopped to help were also not roped together and without ropes.
The basic rule is that anytime you are on a glacier you should be roped. Unfortunately in the Whistler area people have not been doing that and so we are reminding people that when they are traveling on glaciers they should be roped.
This rescue could have turned sour if anything had delayed SAR or if bad weather rolled in.
The woman was finally pulled to safety around 3:45 p.m.
The snow bridge collapsed because the snow it was rotten and she fell through
 Training at Weigele's 05

A video demonstrating a simple z system
A video about a skier in a hole
 Ripsaw Glacier
Whistler Search and Rescue are advising people who are ski-touring glaciers in the backcountry to keep themselves roped together after a crevasse rescue Sunday.
At around 12:30 p.m. a 26-year-old B.C. woman crashed through a snow bridge on the Spearhead Traverse and fell nine metres into a bergschrund crevasse where she became lodged.
The group was luckily within cell-phone range and her two male companions called 911 and a rescue got underway immediately. Nine rescuers went to the area in two helicopters.
Ripsaw Glacier and the usual high route where the snowbridge collapsed
Fortunately the weather was good and the woman was uninjured, all of which helped the rescue have a happy ending.
But said Whistler SAR manager Brad Sills, during the course of the rescue it became clear that, while the party was well equipped and in good physical shape, none of them had a rope.
Indeed two more ski touring groups on the same path who stopped to help were also not roped together and without ropes.
The basic rule is that anytime you are on a glacier you should be roped. Unfortunately in the Whistler area people have not been doing that and so we are reminding people that when they are traveling on glaciers they should be roped.
This rescue could have turned sour if anything had delayed SAR or if bad weather rolled in.
The woman was finally pulled to safety around 3:45 p.m.
The snow bridge collapsed because the snow it was rotten and she fell through
 Training at Weigele's 05
A video demonstrating a simple z system
A video about a skier in a hole
Tuesday, April 15, 2008
Our new headquarters
Whistler Search and Rescue has now moved into our new base at he municipal works yard at Nesters.
The new base will greatly add to the teams organization and functionality in the Whistler valley, and beyond 2010.

Some major improvements in 2008.
To start a new permanent home!
-Office space:
-finally some desk space for all the paperwork
-New computing power: ability to run incident commander software efficiently from a network of multiple computers

New communications platforms:
-additional base radios
-including the installation of a new duplex VHF repeater on Whistler mtn. Increasing our communications capability in previous trouble areas.
-Large training room:
-Can accommodate 30-40 people for large scale briefings on searches
-The ability to use advanced visual aids in real time to present to a group.
-Can accommodate additional computer stations
Garage area
-somewhere to park our truck out of the snow so we don't have to shovel it off every time it snows

Gear storage area
-additional room to store gear

-Access to municipal lunch room etc.
Thanks so much every one that contributed to this huge effort!
Especially the Resort Municipality of Whistler
The new base will greatly add to the teams organization and functionality in the Whistler valley, and beyond 2010.

Some major improvements in 2008.
To start a new permanent home!
-Office space:
-finally some desk space for all the paperwork
-New computing power: ability to run incident commander software efficiently from a network of multiple computers

New communications platforms:
-additional base radios
-including the installation of a new duplex VHF repeater on Whistler mtn. Increasing our communications capability in previous trouble areas.
-Large training room:
-Can accommodate 30-40 people for large scale briefings on searches
-The ability to use advanced visual aids in real time to present to a group.
-Can accommodate additional computer stations

Garage area
-somewhere to park our truck out of the snow so we don't have to shovel it off every time it snows

Gear storage area
-additional room to store gear

-Access to municipal lunch room etc.
Thanks so much every one that contributed to this huge effort!
Especially the Resort Municipality of Whistler
Monday, April 07, 2008
Ai Ito Search

WHISTLER - Missing Japanese snowboarder Ai Ito likely froze to death after she fell during a solo run on Blackcomb Mountain, police said today.
Ito's body was found Sunday by Blackcomb Ski Patrol and the Whistler Search and Rescue team during their continuing search effort.
Searchers found her snowboard at about 2:30 p.m. Sunday, downstream from the area where her body was later found in what is described as the "water basin" beneath the Seventh Heaven run.
Whistler RCMP media relations Const. Afzeel Yakub said the area had been searched before, but heavy snowfall had likely obscured her body. He said warmer weather last week had helped some snow to melt. Ito was only noticed after a faint blue piece of her pant was oberserved only visible from one angle.
"That area had been searched more than once," he said. "If she was visible, she would have been noted earlier."
Her body was found close to where she had last been seen March 20 taking the Seventh Heaven Chairlift. She was reported missing three days later when she didn't show up for English language classes.
Yakub said that over that three-day period "a lot of snow had fallen," hindering the search.
Yakub said it was difficult to say what exactly occurred but on-scene evidence suggested the 25-year-old fell and became too cold to get to safety.
"Indications are that she may have fallen into the basin and tried to get out but you know, having fell back into the creek, hypothermia would have set in that way," Yakub said in an interview Monday.
"She just wasn't able to make it out."
Yakub said Ito's family in Japan have been notified.
Family members went to Whistler after she disappeared, but have since returned to Japan. He said they had been concerned their daughter may have been the victim of foul play or been abducted.
"You can understand how hard it is for parents to have a young child go missing and you know, they were trying every which way to keep some hope of her being alive," he said.
"Knowing that she's been found now will help to alleviate some of that. I don't know if they'll feel any better. . . But at least they know."
He said although Ito's body was found in an out-of-bounds area, she may have become lost.
"All it takes is one slip for something to happen when you're out here enjoying what's otherwise a really safe environment," he said. "There's no indication that she's somebody who would take unnecessary risks. She must have met with an accident or just gotten lost."
Yakub said locating Ito's body after more than two weeks of searching sparked mixed emotions by police, search crews and members of the community.
"There's some sense of relief today, just knowing she's been located because it takes away a lot of the questions," he said. "However, there's definitely, you know, a feeling of sadness in the air."
A news release from Whistler Blackcomb Monday said three patrollers, including a search and rescue dog, located Ito's snowboard Sunday two hours before a Whistler Search and Rescue helicopter found her body. About 100 centimetres of snow had fallen since Ito was last seen, it said.
"Whistler Blackcomb wishes to express its sincere condolences to the family and friends of the deceased," the release said.
Sunday, April 06, 2008
Quebec skier went out of bounds at Whistler
Quebec skier went out of bounds at Whistler, then found dead
Last Updated: Tuesday, March 6, 2007 | 9:43 AM ET
The Canadian Press
No one will ever know why Roch Langlois headed out of bounds off Blackcomb Mountain in Whistler.
But as Search and Rescue members followed his ski tracks down the north side of the mountain, then found his abandoned skis near Wedge Creek before following meandering ski boot footprints back up the slope, it was clear the 34-year-old Quebec tourist was confused.
Brad Sills, head of Whistler's Search and Rescue, said it was indicative of irrational behaviour.
By the time SAR was in the air and on the ground on Sunday, Langlois hadn't been seen for 2½ days.
He was found dead, likely of hypothermia, not far from Green Lake. An autopsy will be done.
Langlois, believed to be an only child, had been dealing with personal issues, said Sills, which may have contributed to his decision-making.
And he had been known to go off on his own for a couple of days at a time. Sills said search crews respond to 10 to 15 calls a week
Tuesday, January 01, 2008
How not to get lost
 A cold night in a creek
Whistler SAR has been receiving many calls of distress from lost skiers, and snowboarders during the last few weeks, and recently with fatal consequences. Back country users in the Whistler area should be prepared to navigate in whiteout conditions, have knowledge of local terrain, proper outdoor gear, a buddy capable of companion rescue, first aid skills, and avalanche training. Cell phones work in some areas, and not in others if your lost conserve your batteries. Always tell someone responsible where you are going, and your time of return, or file a itinerary with the mountain. If you are lost in the back country find a location where you will be visible from the air, and note any prominent landmarks, make a shelter, and stay put. Dial 911 for assistance and don't waste your cell phone batteries.

Whistler SAR would like to remind people that often they will not be reported missing early enough in the day to launch a search, and therefore stand a very good chance of spending the night out. Very likely there will be consequences to your actions.. Many tracks have been spotted from the air from people in precarious situations off the backside of Whistler mtn. Many of the incidents have gone largely unreported probably because no one knew they were out there.
If you leave the ski area boundary into the backcountry you will most definatley see signs.
 You are leaving the ski area boundry
The minumum you should have with you
1. Avalanche transceiver 457khz(on your body)
and demonstrated ability to use it
2. A partner
3. Shovel/ Probe
4. Knowledge of the terrain and your ability.
5. Avalanche knowledge
6. Knowledge of local avalanche conditions
7. Basic First Aid/ Survival equipment
8. Food / Water
9. Charged Cell phone, VHF radio, or Sat phone, contact numbers
10. Navigation equipment.
11. Good backcountry ski/ board
equip in good working order/ ability to ascend
• know this winter’s snowpack layers
• know the recent snowfall & type
• know current CAA Avalanche Center forecast, Whistler mtn Forecast
• know today’s weather forecast (snowfall, temperature & visibility)
Getting lost / How not to get lost
Legend--All maps.
Ski area boundry--pink
Out of bounds/ Caution areas--yellow
Area's to get lost in-- !
Common Mistakes:
Down at the lake: Cheakamus lake is easily accessed during the summer, winter is a different story! You may find yourself 15km away from any civilizaton. Just a bunch of stinky empty pit toilets full from the summer! Also popular shelters for unintentional night outings!
WHISTLER MOUNTAIN
 Cheakamus lake on a beauty day!
 Cheakamus at nightfall as the temperature drops to -10c
If you find yourself here STAY THERE!! It's one of the first places we look! (look for a red or black heli hovering low) Make yourself visible from the air at the shoreline. Helicopter rescue will be your only choice.
This picture is the exact spot and a popular spot to spent a cold night. Stay off the ice it's usually thin! Once again people have died here! There is a map on a bill board near the entrance to the river in a partial clearing near toilets!
-KHYBER PASS / LEFT OF THE KHYBER- This is beyond the ski area boundary. Always travel with a buddy. You may be charged for rescue if mountain resources are used for your rescue. Don't go too far left off STU inn more than 700 vert ft or you will be wandering aimlessly through cliff bands, and gullies going up and down all over the place very disorienting even to locals. You have to clear the pass at this elevation by exiting to the right or your getting sucked into Khyber cliffs, and the Cheakamus Lk area. Exit is via road in clearcut back to creekside. Don't go unless you are with someone that knows where they are going 100%......
 Khyber Pass Area
 Cliffs if you screw up and go too far skiers left!
-CAKE HOLE South west side Whistler mtn ends at a waterfall 2/3 way down flanked by cliffs. Also a Avalanche path. Ducking a rope off the back of the Peak chair (south side) will put you in here. Once your in sucked in it becomes increasing harder to escape the beast! Stay away if you don't know what your doing! There's a small rescue cache attached to a big fir tree (biggest tree in photo lower left)at the bottom of the open area below waterfall near to the summer trail.
 Waterfall at the bottom
 A popular place to spend a night!
-BELOW CAT ROAD ON HARMONY OR PICOLLO NORTH SIDE: A trail provides access to Singing pass don't miss the trail (marked with reflective markers on trees) or you will be in the creek which is a tangle of logs and is flanked in places with cliff bands, and gullies. Fitzsimmons creek is a ugly place.
 North Side Whistler Mtn
 L'avanche
-BACKSIDE PICOLLO- South west side Whistler mtn starts in steep terrain flanked by cliffs. Also a huge Avalanche path with big potential for big avalanches. Prepare for a cold night at Cheakamus lake 11km to the road!!! There is a summer trail out but it's hard to follow in winter (marked with reflective markers on trees) Stay out and don't ski off the back of Picollo.
 Avalanche path runs for 3500ft
WHISTLER BACKCOUNRTY
Whistler's backcountry includes the musical bumps, and is more mellow than Blackcomb offering excellent backcountry skiing.
 Garibaldi park boundry line / Stay left of Yellow line
-EAST SIDE FLUTE/ BACKSIDE- Ducking the rope of the back of Flute is a popular backcountry area in Garibaldi park. Many ski tourers, split boarders use this area. The usual exit is from the singing pass trail. Buy a map! Even locals in a whiteout have a tough time navigate it's broad featureless summit area. The backside of Flute towards Cheakamus Lake (going too far right of yellow line!) Will end you up in terrain you will wish you had never entered! Serious avalanche gullies start here and run right to the lake. Even it you make it to the lake you might as well be on the backside of the moon! Exit to the right via cheakamus lake trail (if you can find it!)Don't go east up the lake to what is called moose meadows, putting yourself even further away into the middle of nowhere!! The usual entrance to the park is along the ski area boundry sign line about 2/3 of the way along it. (going left off summit follow rope then cut right towards oboe) If you don't have backcountry equipment do not use this area!
 Backside Picollo / Cheakamus Lk
 Moose meadows on not such a nice day!
BLACKCOMB MOUNTAIN:
-BELOW 7TH HEAVEN: A tangle of steep terrain, tight thick trees, and bluffs, if you make it to the valley you are in the middle of Fitzsimmons creek just as it gets dark. 8km away from any Civilization
 Below 7th Heaven
-BELOW BLACKCOMB GLACIER SKI OUT: A forest that isn't worth anybodys time. Flat tight trees with two knarly creeks running on either side. Stay out !!
 Blackcomb and Horstman Creeks
BLACKCOMB BACKCOUNRTY
Blackcomb's backcounrty is huge! Full of big glaciers, cliffs, icefalls, gullies, and big mountain terrain. If you don't know exactly what your doing, and are very good at it please stay away. You will get spanked!

-DECKER MEADOWS: You can't get here unless you hike!!! If your going to Corona or Husume know where your going. Blindly following tracks will lead you to Whistler Heli ski pick-up. Only to find the tracks vanish. Don't follow heli-ski tacks. If your going into the Blackcomb backcountry buy a map and know how to navigate in white out conditions. A wrong turn will leave you in Wedge creek for a very cold night in a creek! People have died here before from exposure. 6-8 hours to road if you know where your going!
 Decker Meadows
 Decker Area
RESPECT ALL AVALANCHE CLOSURES AND PERMANENTLY CLOSED AREAS!!!!!
They are absolutely to be respected. People have died many times ducking ropes!!!!!
Duck a rope and be prepared to get yourself into a mess of trouble.
Area's are closed for a good reason..... People rountinly die here!


 Enter only through gate
Travel with competent companions, and be prepared for self rescue.
RESCUE MAY NOT BE POSSIBLE!!
If you require assistance dial 911..
Subscribe to:
Posts (Atom)